In this Topic Hide
NowPrint provides functionality that allows custom fields to be added to the ordering process to capture this information. These fields are highly configurable with options to define how the data is collected, default values, minimum/maximum lengths and specific validations.
Capturing special delivery information
Example: Dropdown list with special delivery options (Front desk, Mailbox, None)
Capturing additional fields of information during order checkout
Example: Prompting the print buyer to enter special fields such as a department code, or other value
Requesting information from the Print Buyer that needs to be shown on the production job ticket
Example: Adding a dropdown list that reads “Please call me to discuss my order.”
There are four types of Custom Data Fields in NowPrint:
User: User custom data fields allow information to be captured during the ordering process from fields that are also available as part of the user profile.
Job: Job custom data fields allow information to be captured during the ordering process.
Alert: Alert custom data fields allow for the capture and notification on the production job ticket of special information associated with the job. These fields can also be searched by in the CSR queue based on Corporate Account and Data field value.
Delivery: Delivery custom date fields are used to capture custom information that is associated with the delivery step of the order workflow. Only one of these fields can be active at a time, per workflow.
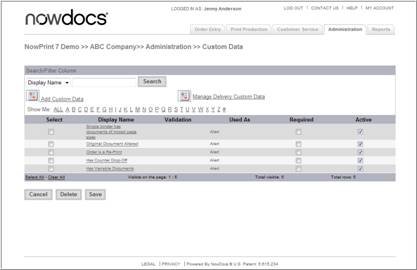
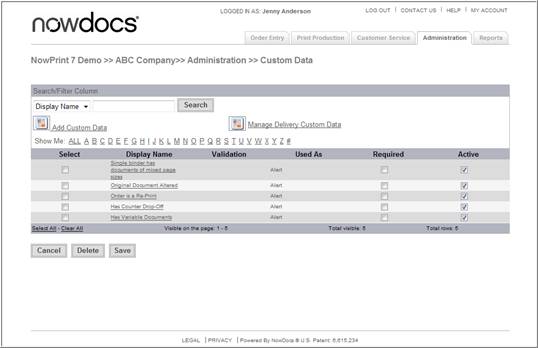
Adding Standard Custom Data Fields: Select “Add Custom Data” to add a custom data field.
Managing existing Standard Custom Data Fields: Within the datagrid, you can delete, enable/disable (active) and make a Custom Data Field required.
Use the following steps to create and/or edit a custom job, alert, or user custom data field:
Click the Admin link from the NowPrint homepage.
Click the Edit link under the Custom Data Field Settings option.
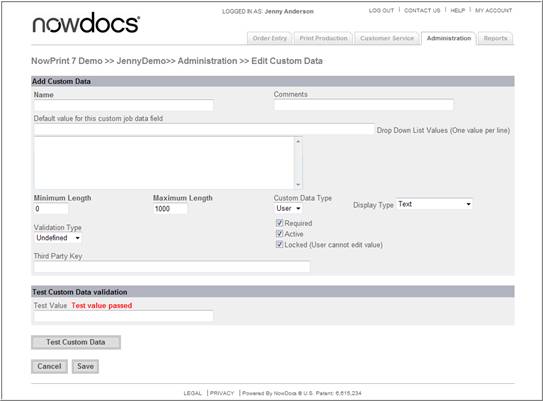
Name and Comments (displayed to the buyer).
Default value : an optional default value.
Dropdown list values: the list of dropdown values presented to the buyer when the Display Type is List.
Minimum / Maximum Length: the least or most amount of characters that are allowed for this field.
Custom Data Type: Defines whether the custom field will be an Alert, User, or Job field type. See above for more details on each of these.
Display Type: Allows for selection between textbox and dropdown list for the input control type.
Validation Type: Allows for the selection of a validation from the system. Validations are configured and saved at the Master Account level in the Validations Functional Area.
Required: Configures the field to require input.
Active: Enables of disables the field.
Locked:Populates the field and does not allow the user to enter a value.
Third Party Key: This field is only used in external integrations.