
In this Topic Hide
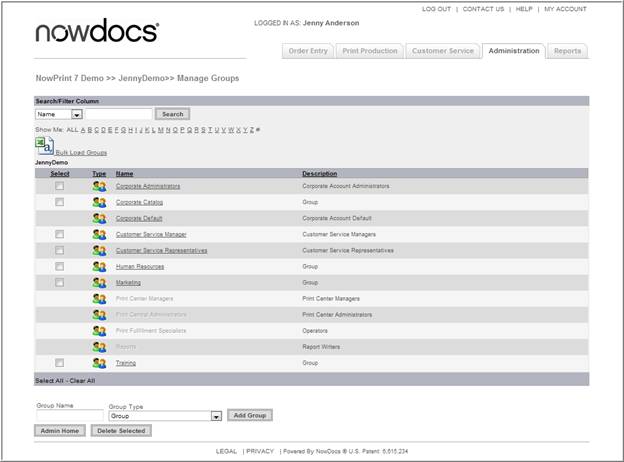
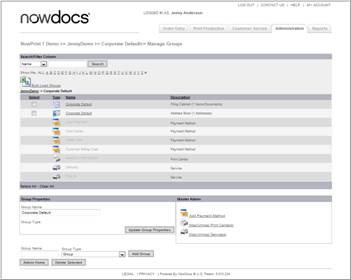
Within a Corporate Account, you can create an unlimited number of groups in order to further segment your users. Groups are a collection of users who share the same settings and offerings within NowPrint. Each group has its own unique file cabinet (catalog) and address book. Each group can be mapped (associated) to delivery services, print centers, and payment methods. Thus, each group can have a unique set of delivery services, print centers, and payment methods available to the users who belong to the group.
Every Corporate Account has a Corporate Default group. This is where the default filing cabinet, address book, delivery services, print centers, and payment methods are stored.
1 Bulk Load Groups – add multiple groups from a CSV File
2 Delete Selected – delete a group from the Corporate Account
3 Add Group – add a group to the Corporate Account
Individual Groups can be added using the Add Group option.
Use the following steps to add a group:
Click the Admin link from the NowPrint homepage.
Click the Edit link under the Group Settings option.
Enter a group name in the Group Name text box.
Select a group type from the Drop Down List box. Group type categories pertain to special permissions associated with the group you have selected. Customer Service, Print Center Manager, etc have restricted access to different admin functions. Placing a user into one of these groups and checking the box to enable the corresponding permission in their profile will allow them to have access to functionality associated with this group.
1 Corporate Administrators: This group can access the Administration interface for a Corporate Account and manage the users, print centers, and products within the Corporate Account.
2 Corporate Default: All users of the system are automatically part of the Corporate Default group.
3 Customer Service Manager: This group can access the Customer Service interface and coordinate activities between print buyers and internal production staff members.
4 Customer Service Representatives: This group can access the Customer Service interface and interact with print buyers.
5 Print Center Managers: This group can access the Print Production interface and perform all order adjustments.
6 Print Center Administrators: This group can access the Print Production interface and manage print center definitions.
7 Print Fulfillment Specialists: This group can access the Print Production interface and produce orders.
8 Reports: This group can access the Reports interface and run reports.
Click the Add Group button.
![]() Click here to watch a short video on Adding a
Group
Click here to watch a short video on Adding a
Group
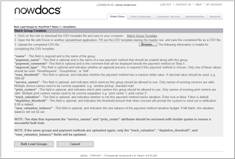
The Bulk Load Group option allows Corporate Account administrators to upload multiple Groups at once using the Batch Group Template found in the NowPrint site.
Use the following steps to Bulk Load Groups:
Click the Admin link from the NowPrint homepage.
Click the Edit link under the Group Settings option.
Download, complete, and save the Batch Group Template to your computer. Table definitions are below:
1 Name - This field is required and is the name of the group.
2 Payment_name - This field is optional and is the name of a new payment method that should be created along with this group.
3 Payment_comments- This field is optional and is the comment that will be displayed beside the payment method on Step 4.
4 Approval_type - This field is optional and indicates whether an approval process is required if this payment method is chosen. Only one of these values should be used: ‘nonerequired’, ‘groupadmin’, or ‘Self’.
5 Max_threshold - This field is optional, and indicates whether the payment method has a maximum dollar value. A decimal value should be used; e.g. ‘999.00’
6 Service_names - This field is optional, and indicates which services this group should be allowed to use. Only names of existing services are valid. Multiple service names need to be comma separated. E.g. ‘window pickup, standard mail.’
7 Print_centers - This field is optional, and indicates which print centers this group should be allowed to use. Only names of existing print centers are valid. Multiple print centers names need to be comma separated. E.g. ‘print center 1, print center 2’.
8 Track_valuation - This field is optional, and indicates whether or not this payment method tracks valuation. Enter true or false. False is default.
9 Depletion_threshold - This field is optional, and indicates the threshold amount that when crossed will prompt the system to send out a notification. 0.00 is default.
10 New_valuation_balance - This field is optional, and indicates the new balance of the payment method valuation budget. If left blank, the valuation balance will not be set.
Note: The data that represents the service_names and print_center attributes should be enclosed with double quotes to ensure a successful bulk load.
Note: If the same groups and payment methods are uploaded again, only the track_valuation, depletion_threshold, and new_valuation_balance fields will be updated.

1 Click the Browse button.
2 Locate the completed Batch Group Template and click the Open button.
3 Click the Bulk Load Groups button.
![]() Click here to watch a short video on Bulk Loading
a Group
Click here to watch a short video on Bulk Loading
a Group
Unneeded groups can be removed from the site using the Delete Group function.
Note: All users need to be removed from a group prior to deleting a group.
Use the following steps to delete a group:
Click the Admin link from the NowPrint homepage.
Click the Edit link under the Group Settings option.

Select the desired group(s).
Click the Delete Selected button.
![]() Click
here to watch a short video on Deleting a Group
Click
here to watch a short video on Deleting a Group
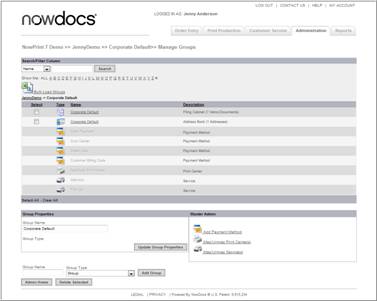
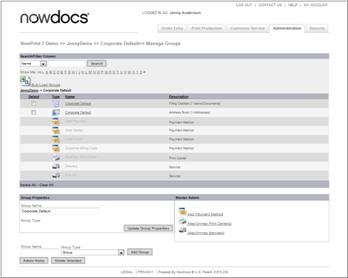
Each group has its own unique file cabinet (catalog) and address book. Each group can be mapped (associated) to delivery services, print centers, and payment methods.
Grayed out options can be edited by the Master Account Administrator.
Use the following steps to Add/Edit Payment Method for a group:
Click the Admin link from the NowPrint homepage.
Click the Edit link under the Group Settings option.
Select the desired group.
Click the Add Payment Method link.

Enter a payment method name.
Select the appropriate Approval method:
After an order is placed by the users in the group using this payment method, the order will be held and appeared on the home page of the specified approver(s). The order will be considered successfully created and available in the print production queue after the one of the approvers approves it.
Non Required – no approval is required.
Self – users can have a chance to review their order before they submiting their orders for production.
Group Admin – the group admin needs to approve the order prior to submission to the print center. See page 6-32 to define group admin approvers.
Quote – When an order is placed with this payment method, the customer is asking for a quote on this item, and this order should NOT be produced.
Enter a Max Order amount in the Max Threshold text box.
Select the Max Threshold Approval requirement.
With a Max Threshold value entered and an approver type selected, if an order using this payment method has its order total value over the specified max threshold, the order will be held for approval before it can appear in the print production queue. If more than one approver are assigned (e.g. more than one group approver when Group Admin is selected), only one approver needs to approve the order.
1 Non Required
2 Self
3 Group Admin
4 Quote
Enter a Default Value Payment Method. If you have selected the Display Account Textbox, use the Default value for this payment method field to specify the value that will appear in that field by default (for example, a specific purchase order number). Select the Value is locked checkbox to prevent users from changing the default value. If you would like users to have the ability to change the default value, then do not select this checkbox.
Select an appropriate payment provider.
Click the Submit button.
![]() Click
here to watch a short video on Adding a Payment Method
Click
here to watch a short video on Adding a Payment Method
Corporate Print centers can be mapped to specific groups within a Corporate Account. In a case where a system is set up with multiple print centers, users have the ability to select the desired print center when placing their order(s) (if the print center selection feature is enabled in the workflow setup). See page 6-46 for more information on print center settings.
Use the following steps to map or unmap a print center:
Click the Admin link from the NowPrint homepage.
Click the Edit link under the Group Settings option.
Select the desired group.
Click the Map/Unmap Print Centers link.
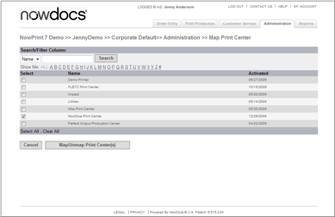
Select or deselect the desired print center(s).
Click the Map/Unmap Print Center(s) button.
![]() Click here to watch a short video on Mapping/Unmapping
a Print Center
Click here to watch a short video on Mapping/Unmapping
a Print Center
Delivery options can be mapped to specific groups. Users have the ability to select their desired delivery options when placing their order(s).
Use the following steps to map and/or unmap delivery services:
Click the Admin link from the NowPrint homepage.
Click the Edit link under the Group Settings option.
Select the desired group.
Click the Map/Unmap Services link.
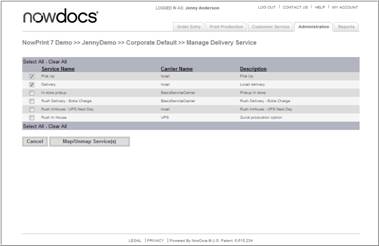
Select or deselect the desired delivery service(s).
Click the Map/Unmap Service(s) button.
![]() Click
here to watch a short video on Mapping/Unmapping a Delivery Service
Click
here to watch a short video on Mapping/Unmapping a Delivery Service