In this Topic Hide
The user interface settings allows you to customize the Corporate Account.
Branding: update the Corporate Account color theme and logos.
Address Fields: customize the buyer address fields.
Legal Statements: customize NowPrint site legal statements.
Error Messaging: customize NowPrint error messages.
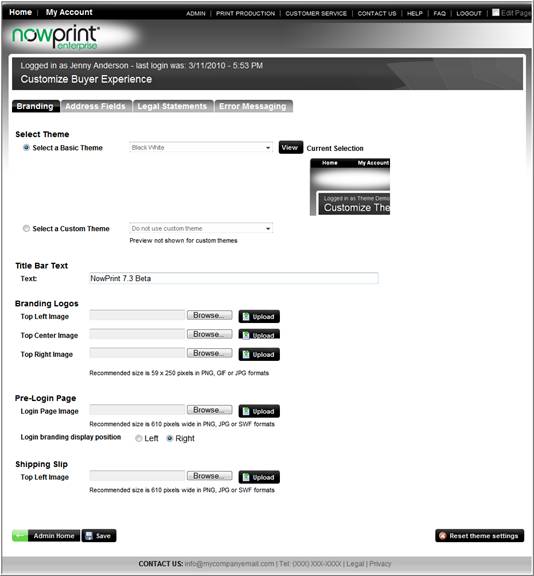
Use the following steps to select update a corporate account branding:
Click the Admin link from the NowPrint homepage.
Click the Edit link under the User Interface option.
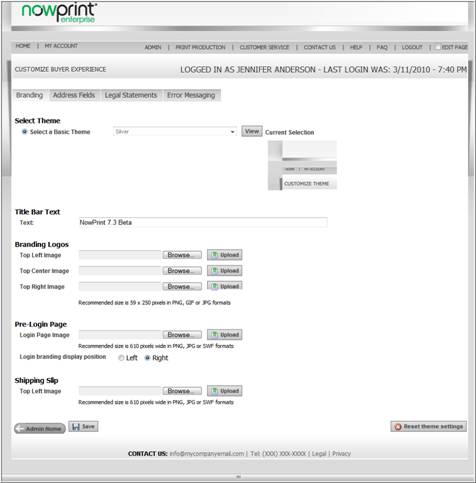
Select the Desired Theme.
Choose a basic theme from the dropdown list box.
To view an image of the theme, click the View button.
Note: Master Account Admins have an option to select a basic theme or a custom theme. See page 5-4 for more information on Master Account Branding settings.
Enter text to displayed in the Title Bar Text field.
Branding Logos
Click the Browse button to locate a logo to replace the existing logo(s) in the upper left, center, or right of the screen.
Click the Upload button
Pre-login Page
Click the Browse button to modify the image displayed on the pre-login page.
Click the Upload button.
Shipping Slip
Click the Browse button to modify the shipping slip logo.
Click the Upload button.
Click the Save button.
The screen refreshes with the selected changes displayed.
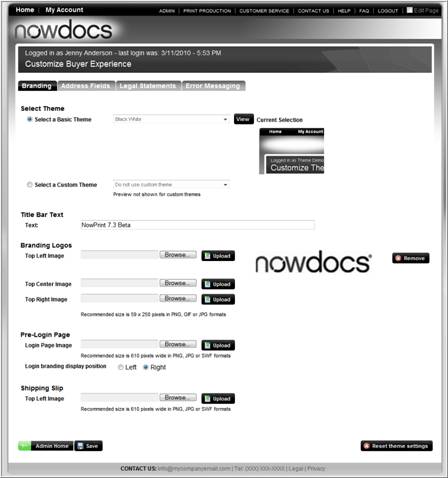
Note: To revert back to the Corporate Account default settings, click the Reset theme settings button.
![]() Click
here to watch a short video on Updating the Corporate Account Branding
Click
here to watch a short video on Updating the Corporate Account Branding
The Update Address Fields setting allows users to customize the address field labels and error messages.
Use the following steps to update the address fields:
Click the Admin link from the NowPrint homepage.
Click the Edit link under the User Interface option.
Click the Address Fields tab.
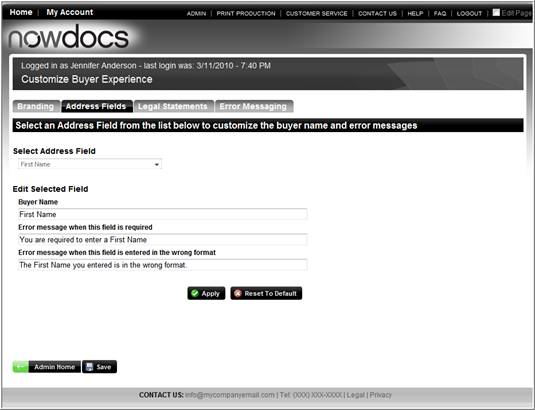
Select the desired Address Field.
Enter the desired label for the selected field.
Enter the desired error message for the desired field.
Enter the desired error message if the field is in the wrong format.
Click the Apply button.
Click the Save button.
Note: to restore to the Corporate Account defaults, click the Reset to Default button.
![]() Click
here to watch a short video on Updating the Corporate Account Address
Fields
Click
here to watch a short video on Updating the Corporate Account Address
Fields
The Update Legal Statements tab allows Corporate Account Administrators to customize the Terms and Conditions, Privacy, and legal statements within the site.
Use the following steps to update the site legal statements:
Click the Admin link from the NowPrint homepage.
Click the Edit link under the User Interface option.
Click the Legal Statements tab.

Select the Enabled checkbox to enable the statement within the site.
Enter and/or modify the desired text for the selected section.
Use the HTML editor buttons to modify the formatting of the text.
Click the Save button.
Note: to restore to the Corporate Account defaults, click the Reset to Default button.
The Error Messaging section allows Administrators to update the system error message. In addition to the composed message, users will usually get a log error number than should be provided to NowDocs when reporting the error.
Use the following steps to update the site legal statements:
Click the Admin link from the NowPrint homepage.
Click the Edit link under the User Interface option.
Click the Error Messaging tab.
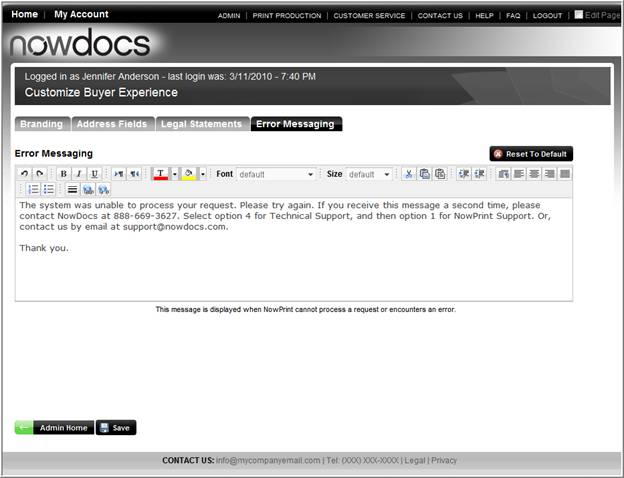
Enter and/or modify the desired text for the selected section.
Use the HTML editor buttons to modify the formatting of the text.
Click the Save button.
Note: To restore to the Corporate Account defaults, click the Reset to Default button.