In this Topic Hide
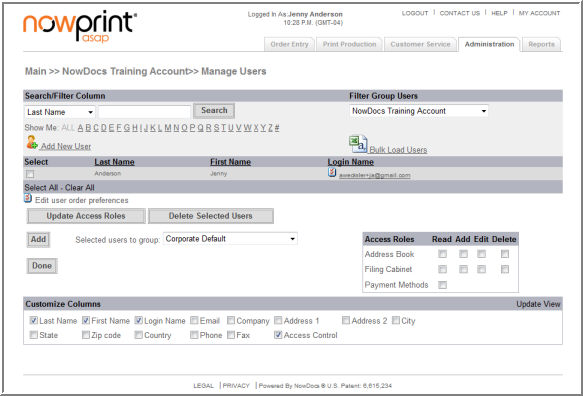
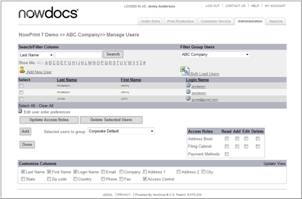
The User Settings section allows corporate administrators to view, add, and edit users on the Corporate Account. Users can be added and removed from a Corporate Account Group, as well as have a definition for access privileges within the group.
Add new user – navigates to the add new user screen.
Bulk Load Users – add multiple users to the Corporate Account by uploading a CSV File.
Update Access Roles – modify a user’s access to the Group’s Address Book, Filing Cabinet, and Payment Methods.
Delete User – remove a user from the Corporate Account.
Add – Add users to a group.
Customize Columns – modify which data is displayed for the user group.
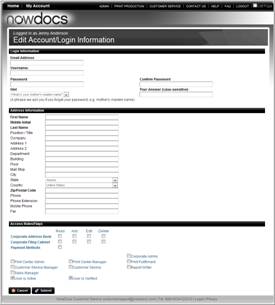
Corporate Account administrators can add users using the Add New User option.
Use the following steps to add a user:
Click the Admin link from the NowPrint homepage.
Click the Add User link under the User Interface option.
OR
Click the Edit link under the User Interface option.
Click the Add New User link.

Enter the new user details.
Select the Access Role settings.
Click the Submit button.
The Bulk Load User option allows Corporate Account administrators to upload multiple users at once using the Registration Template found in the NowPrint site.
Use the following steps to bulk load users:
Login as a corporate admin.
Click the Admin link from the NowPrint homepage.
Click the Edit link under the User Interface option.
Click the Bulk Load User link.
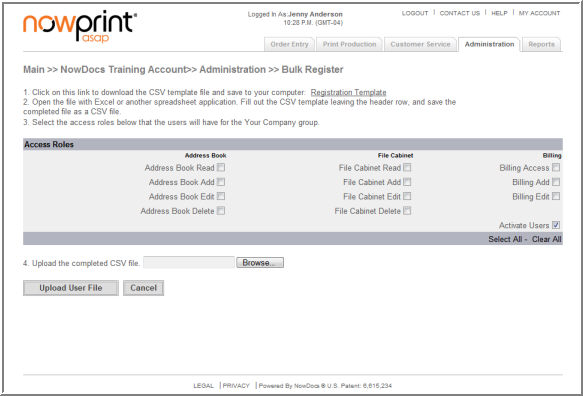
Click on the Registration Template link. This will download the template to use for the bulk upload of users. Complete the template and save it to your computer.
Select the Access Roles the users will have.
Click the Browse button.
Locate the Registration Template on your computer and click open.
Click the Upload User File button.
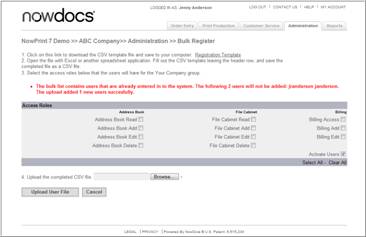
A message displays with the upload results in red.
![]() Click here to watch a short video on Bulk Loading
Users
Click here to watch a short video on Bulk Loading
Users
A user's access roles determine which NowPrint interface(s) the user is permitted to access, as well as what functionality is available to that user within the interface(s). Access roles are set up by the corporate or master administrator, and can be modified at any time.
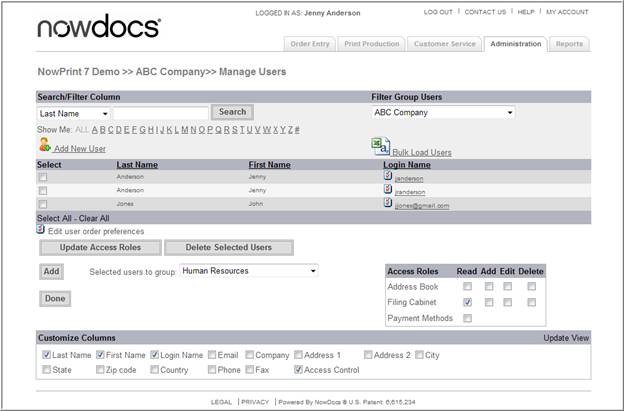
User functionality can be updated for multiple users in the Manage Users section of the Admin page.
Use the following steps to update the user functionality for multiple users:
Click the Admin link from the NowPrint homepage.
Click the Edit link under the Manager Users option.

Select the desired user(s).
Select the desired Access Roles setting(s) for the users whose access rights are to be updated.
Click the Update Access Roles button.
![]() Click
here to watch a short video on Updating the Corporate Account Access Roles
Click
here to watch a short video on Updating the Corporate Account Access Roles
A user can be set as an approver so that he/she can view the orders that use payment methods required approval before it can be released to the print production queue. The approvers can then decide to approve or disapprove the orders.
Use the following steps to set a user an an approver:
Click the Admin link from the NowPrint homepage.
Click the Edit link under the User Settings option.
Select Corporate Default from the Filter Group Users dropdown list.
Select the checkbox under the Approver column for the users to be set as the approvers.
Click the Update Access Roles button.
A user's access roles determine which NowPrint interface(s) the user is permitted to access, as well as what functionality is available to that user within the interface(s). Access roles are set up by the Corporate administrator when adding a user to the system, and can be modified at any time.
User Corporate Account functionality can be updated for individual users.
Use the following steps to update the user Corporate Account settings:
Click the Admin link from the NowPrint homepage.
Click the Edit link under the Manage User option.
Click the user login name you wish to edit.
Select the desired Access Roles setting(s).
Click the Submit button.
![]() Click here to watch a short video on Updating
User Roles
Click here to watch a short video on Updating
User Roles
Within a Corporate Account, you can create an unlimited number of groups in order to further segment your users. Groups are a collection of users who share the same settings and offerings within NowPrint.
Use the following steps to add a user to a group:
Click the Admin link from the NowPrint homepage.
Click the Edit link under the Manage Users option.
Select the desired user(s).
Select the desired group.
Set the selected users’ access role to the group in the “Access Roles” section on the right.
Click the Add button.
![]() Click
here to watch a short video on Adding Users to Groups
Click
here to watch a short video on Adding Users to Groups
Once a user has been added to a group, access settings need to be defined for the user.
Use the following steps to update access settings for users:
Click the Admin link from the NowPrint homepage.
Click the Edit link under the Manage Users option.

Select the desired group from the Filter Group Users dropdown list box.
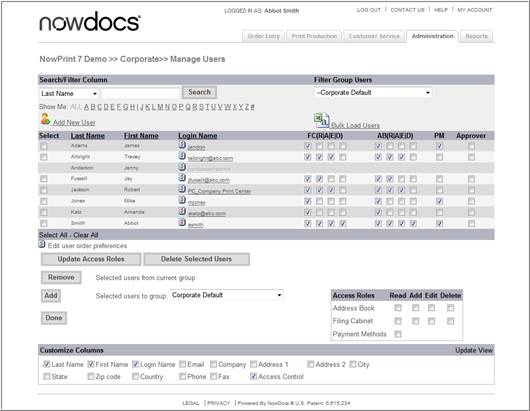
Select the desired user roles.
FC = Group Filing Cabinet. Use this section to define the access levels for the Group Filing Cabinet. The Group Filing Cabinet is displayed in the Catalog Workflow.
AB = Group Address Book. Use this section to define the access levels for the Group Address Book.
PM = Payment Methods. Use this section to allow users to use the Group Payment Options.
Approver = Group Approver. Use this section to define the user as an order Approver for the group.
R = Read
A = Add
E = Edit
D = Delete
Click the Update Access Roles button.
![]() Click
here to watch a short video on Updating User Group Access Roles
Click
here to watch a short video on Updating User Group Access Roles
Use the following steps to remove a user from a group:
Click the Admin link from the NowPrint homepage.
Click the Edit link under the Manager Users Interface option.

Select the desired group from the Filter Group Users dropdown list box.
Select the desired User(s).
Click the Remove button.
![]() Click here to watch a short video on Removing
a User from a Group
Click here to watch a short video on Removing
a User from a Group
Display columns can be added/removed using the Customize Columns section of the Manage Users window.
Use the following steps to edit the customize user display:
Click the Admin link from the NowPrint homepage.
Click the Edit link under the Manager Users Interface option.
Select the desired columns to be displayed at the “Customize Columns” section on the bottom of the page. to be displayed.
Click the Update View link.
![]() Click here to watch a short video on Customizing
the User Group Display
Click here to watch a short video on Customizing
the User Group Display